Hello!
To use the forum, login or register above.
(If you are already logged in above, please click here)
Master Builders: building LEGO furniture

Hello Master Builders! Here's something I have wanted to do for a while, but before I actually start physically building, I really could use other opinions...
Let's pick a standard little table:
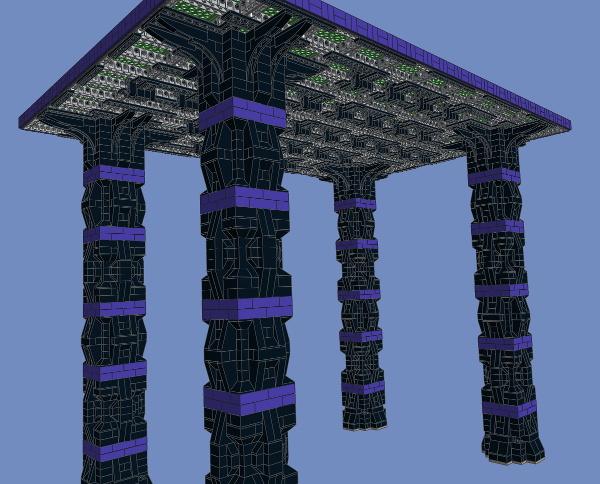
High resolution here
The legs are reinforced by technic beams all the way through, and similarly attached to the top surface, so I'm not worried about that part.
On the other hand, the current table surface is worrying:
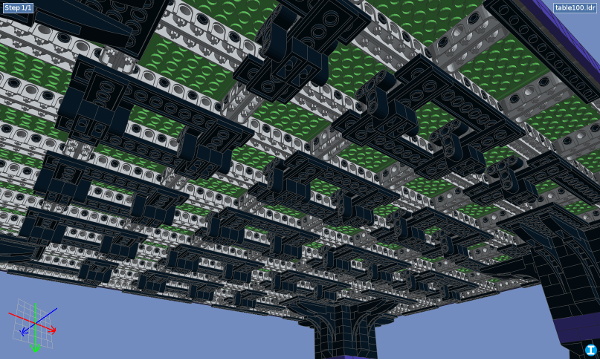
High resolution here
Ideally, we should use very long supporting arches. Besides arches between table legs, extending arches up to the center of the table (coming from both directions) would really consume a ton of bricks. It would also be very heavy (and expensive!). Alternatively, a double layer of 6x8 technic centers (with 0.66 spacing between them), with vertical technic beams connecting the layers, could perhaps work?...
Or I could bring out the heavy artillery:
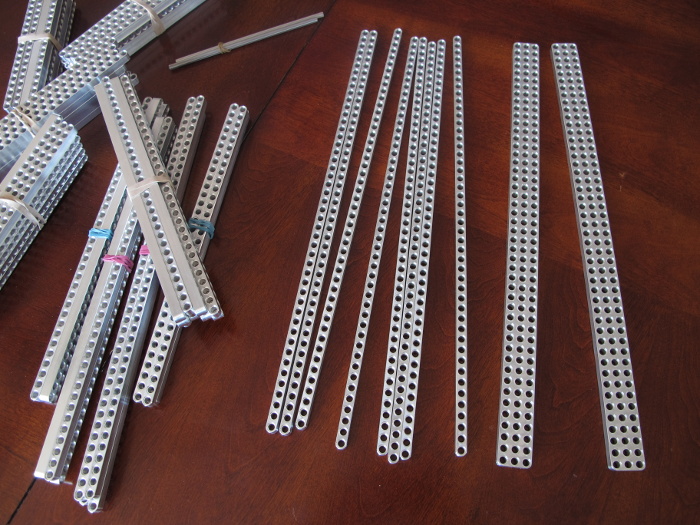
My builder ethic only lets me use the aluminum when it isn't visible, so the underside would have to be covered. We would still need aluminum beams extending in both directions, meaning a lot of them and a thick surface... unless the aluminum in one direction is being combined with supporting arches in just the other direction? Or some other combination of techniques?
What do you think? What would you suggest for a robust table surface?
Thanks!
And here's the top view if anyone is curious:
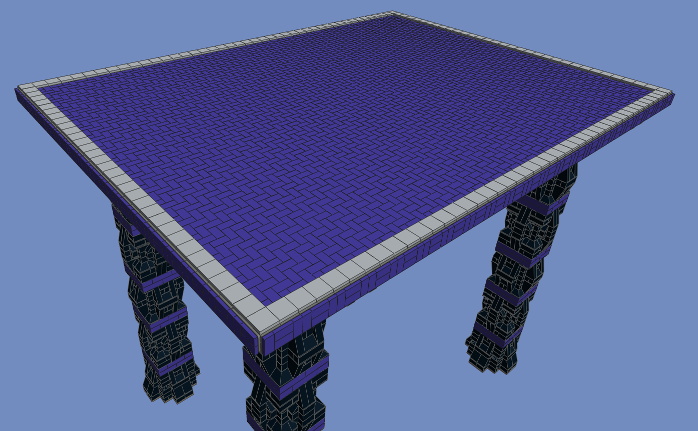
High resolution here
Powered by Vanilla
Comments
Some parts from the PAB walls was good like 2x4 and 2x8 white bricks, 1x1x5 and 1x2x5 bricks, 1x6x5 white panels, 1x2 trans clear bricks and 4x6 white plates. I wish they have 2x2 tan and white tiles.
What's the size of your table?
I would take the longest dimension and try building a section of table to that length.
I think you need to make a square strong beam-like frame, to wich you connect the 4 stands.
That part should be very strong and easily movable, then you can think of many ways to build the table itselve, and think of a way to connect it so it doesnt fall or slide off.
To move the table, you can easily remove the top from the frame and stands.
Now you need to think of many variables, as to make one build, wich is nearly impossible to do.
Cheers, George
http://www.ufunk.net/en/design/lego-table-design/
http://www.holedesigns.com/lego-table-2012
Giant bricks could be made of lego. I think someone on BO is already selling plans for these.
http://houseofanais.onsugar.com/create-your-own-lego-looking-furniture-setups-15216926
My favourite.
http://legoexpress.tumblr.com/post/1055958114/pashminasandpeace-dear-lego-boy-can-you-make
That bridge picture would suggest the "double layers" of 6 x 8 technic bricks. To reinforce with diagonal beams (and simultaneously connect the two layers with system bricks/plates), it would imply a distance of 80 LDU (10 plates). Something like this?
While a angle of acos(0.6) instead of acos(0.8) would produce a distance of 60 LDU between the layers, making it "impossible" to connect the layers by system bricks.
Well, that looks strong in both directions although also very thick... I guess I'll have to do some physical experiments.
@Lawrence If you aren't a purist, another way would be to use a glass panel as the top surface, contained within and supported by a "frame" of Lego. It sure would be a lot easier to clean.
@Markyd7 Eheh, these are quite a different style. For me, everything must be reinforced by technic beams. I would never build anything where just the clutch of studs is holding everything!
Edit: After thinking some more, I really need to make the legs detachable. Thanks @BrickFeverParts!
If your gonna start this, and you are in need of technic pins, let me know, i can give you a few Thousand if you pay for shipping!
George
Just had a quick play with mostly 2x4 bricks and 6x6 plates. It's what I had to use in bulk.
The gap is 70cm. The weight on top is 3kg. 2nd photo shows the flex.
I sometimes overlook that studs can be put under stress, I always and systematically use technic to bear any kind of load. I'll being doing some testing as well over here.
Thanks!
It's 4 studs thick in places and 6 where I used the 6x6 plates.
Other size plates would work, just need to beak up the repeating join pattern which is where the flex comes from. I guess 2x6 or larger would help a lot.
Look forward to seeing your tests.
I'm posting images just before the final touch, as they show the construction somewhat more. The Lego purist solutions for a strong surface that I could see were going to be absurdly heavy, so I opted for 4 beams of aluminum. It follows @BrickFeverParts 's suggestion of the top being detached from the legs.
The graphics card is there just to give a sense of scale. Every geek knows the size of a graphics card, right?
Thanks for all the tips!
High resolution here
But my ideas of now building a replacement for the dining table are facing domestic opposition.
The 6 month average sale price by quantity of all the parts is $630. But many parts are in low demand, so an experienced and patient buyer can get it all for about $400. And if you are a seller and dig from your own inventory, surely the cost can drop to $300 or so.
The aluminum adds a $50 or so. It's not that bad overall... although my estimates for a dining table are rather scary.
High res: http://www.bricksync.net/legotable004.jpg
Low res: http://www.bricksync.net/legotable004small.jpg
It's fine on PC.
Looks Amazing.
You should create a video on how you made it and post on Youtube. Try and make a little cash out of it!